Instructions for a reversible bag
Edit January 2024:
This tutorial is from 2011 and is still very popular. Zime for a revamp!
There is now an actual sewing pattern for this bag for download and even a video tutorial on YouTube!
---
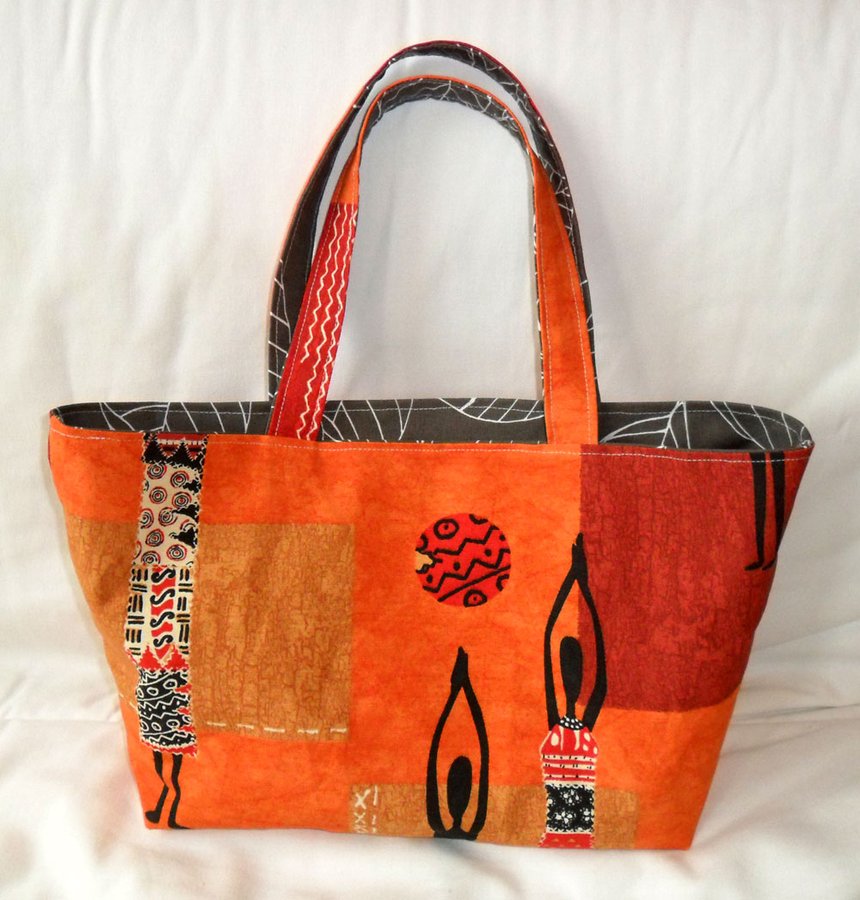
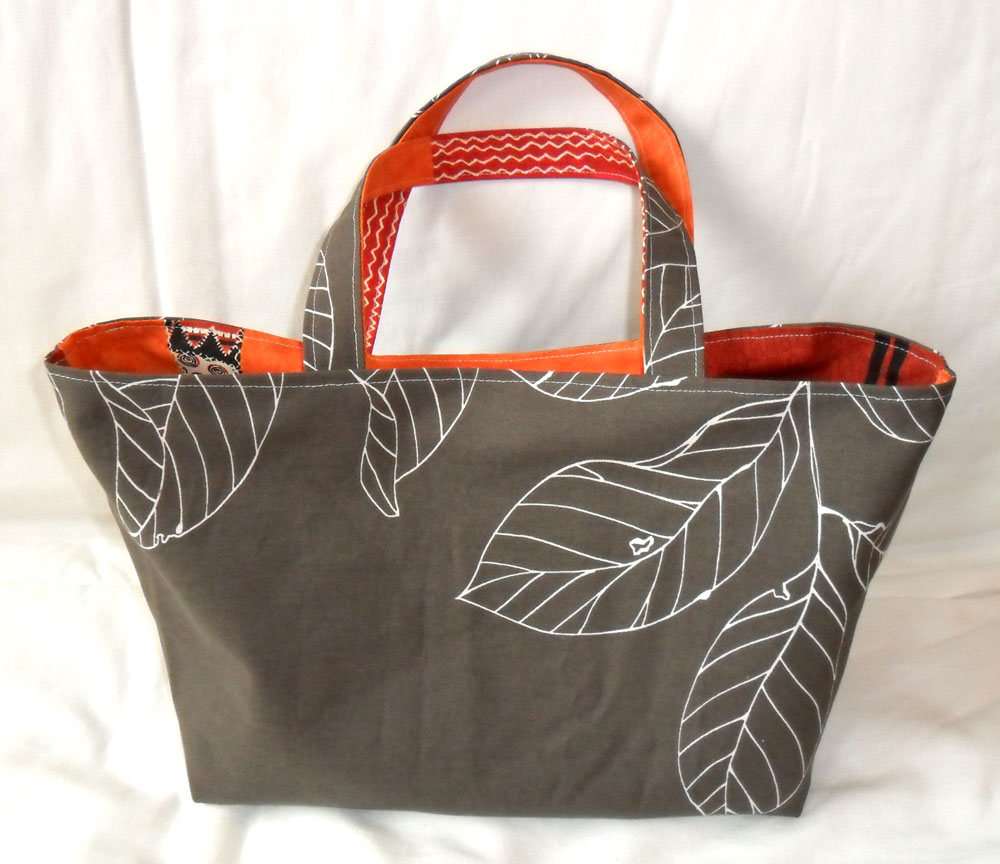
Today I have another tutorial for you: a reversible tote bag, super easy to sew and with the right fabric a real eye-catcher. Every jute bag turns pale with envy. ;)
The pattern is really simple. Therefore here is only a description and no download. You can create your own measurements right away.
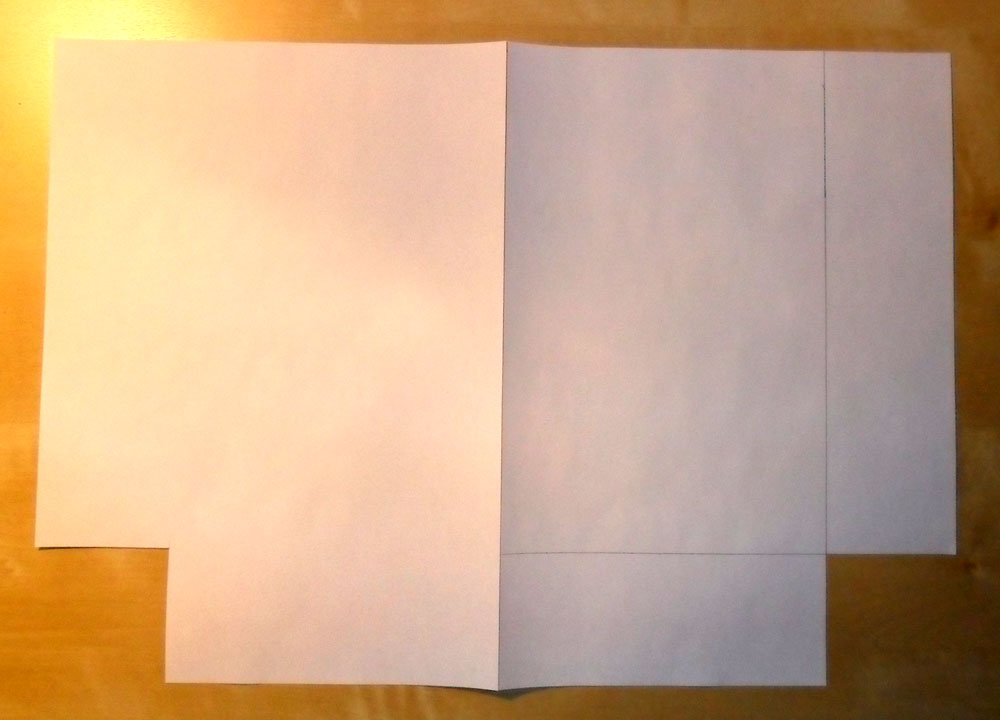
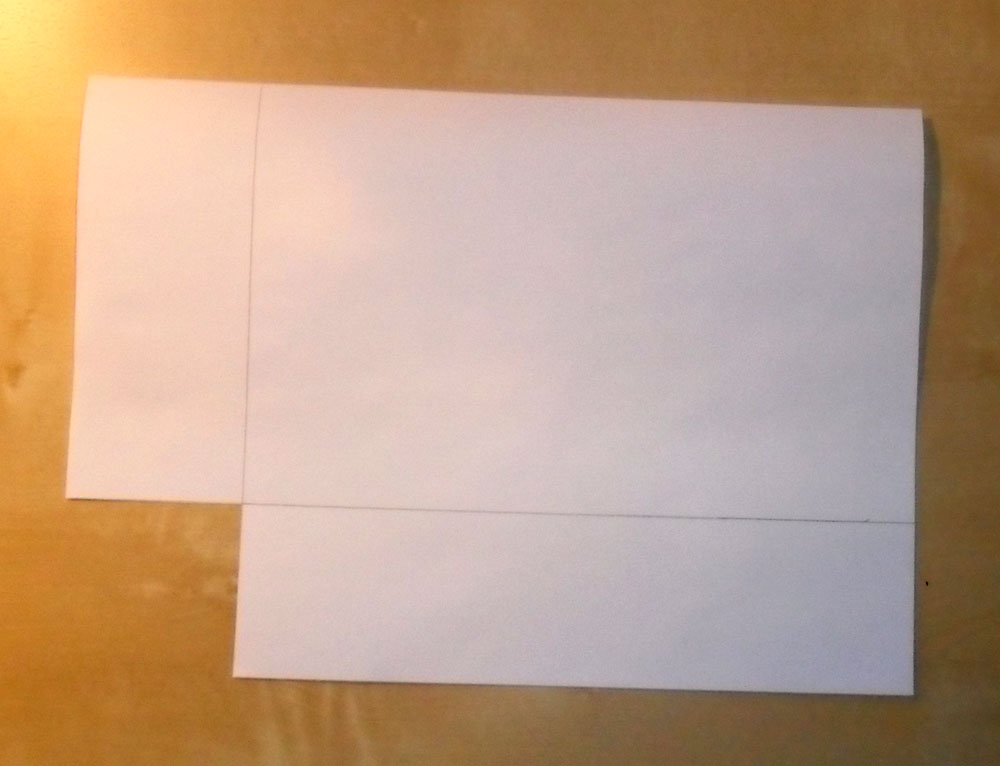
We just need a rectangle. With this rectangle, we cut out a square piece on each side in the two corners. The wider this square, the thicker the bag, i.e. the bottom of the bag is twice as wide as the square.
I simply glued two A4 sheets of paper together for my bag. The squares are 6 cm wide.
Of course, a bag also needs handles. For this one we need two strips of fabric that are twice as long and twice as wide as the finished carrier should be. For my bag, 2.5 cm is a good width for the handles. So I cut the 5 cm wide strips of fabric.
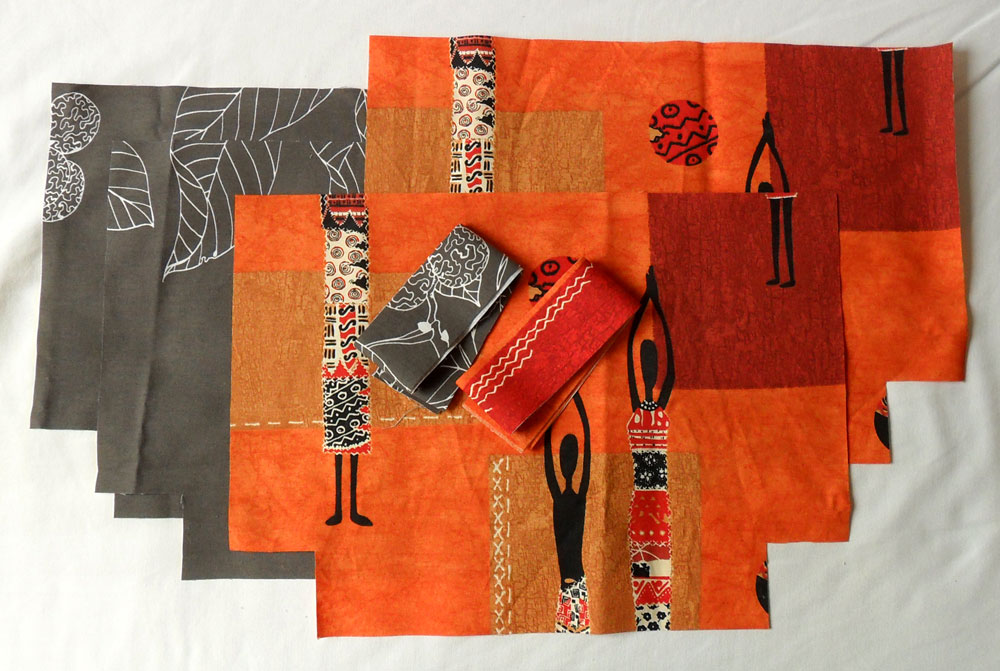
Since our bag should be reversible, we need two different fabrics. The best is a simple and a colorful one. The sewing pattern for the bag is cut out twice from each fabric with a centimeter seam allowance. Together with the two strips of fabric for the handles, there are a total of 6 parts.
First, the handles are prepared.
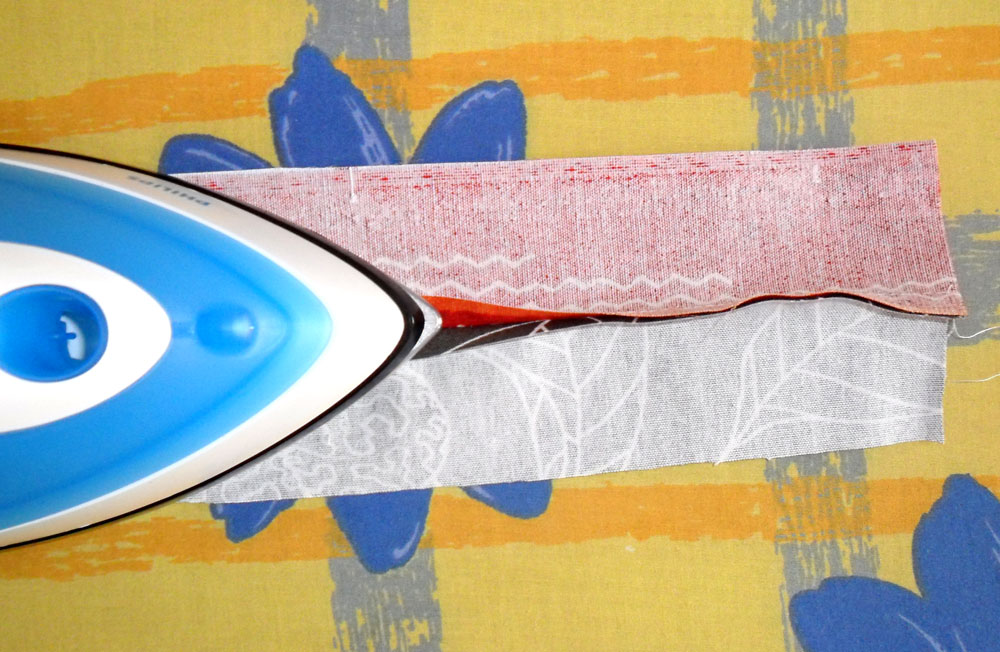
Place the two strips of fabric with their right sides on top of each other and topstitch on one side with a half centimeter distance. Press the seam allowance open.
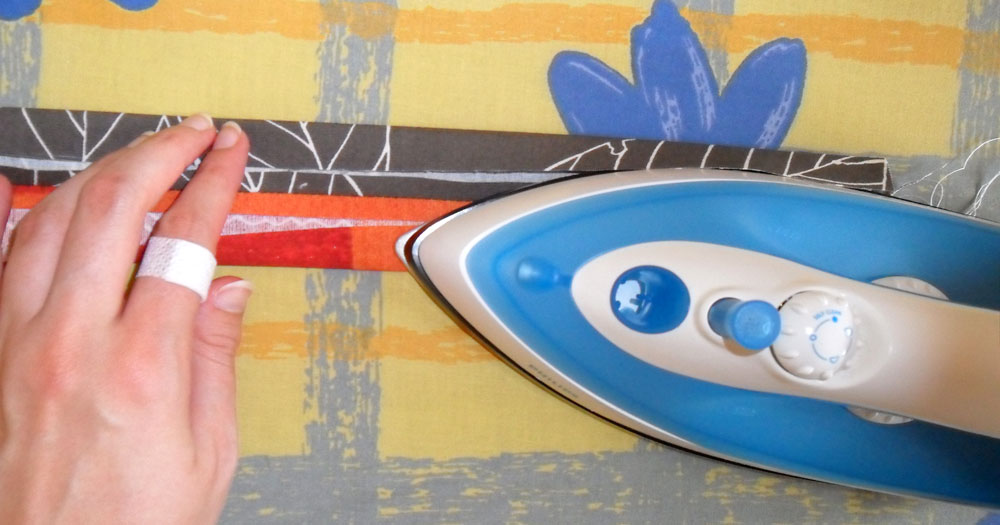
Then the upper and lower sides are pressed lengthways so that the edges of the fabric almost (only almost) touch.
Fold the two sides together and topstitch a few millimeters on the open side. Then topstitch the opposite side with the same distance and cut the finished tape in the middle.
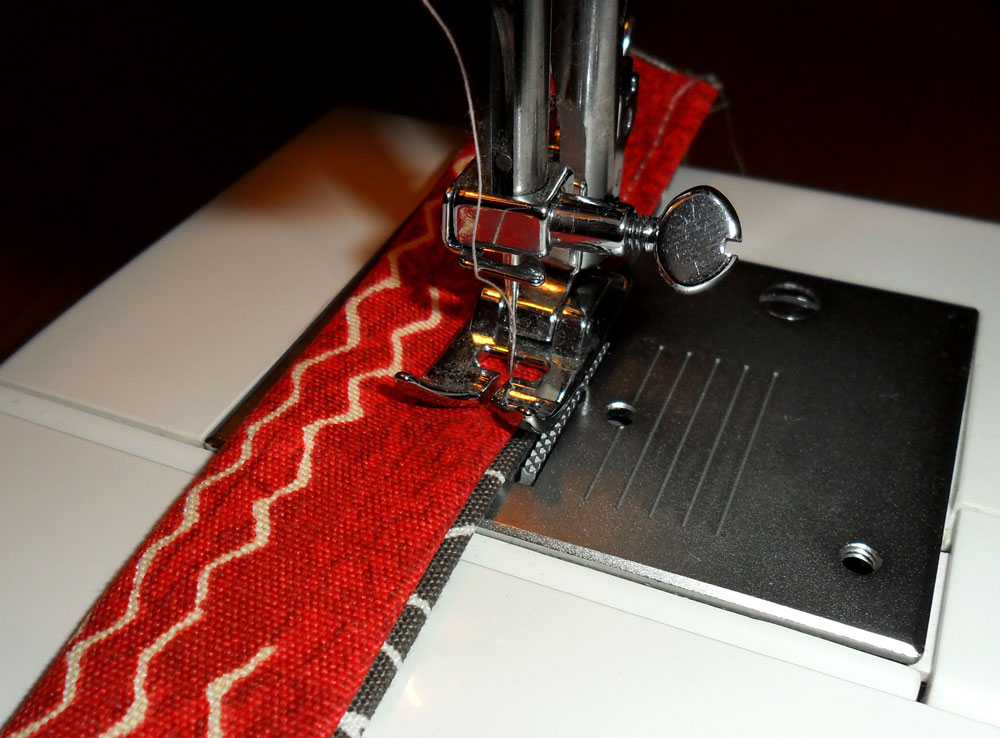
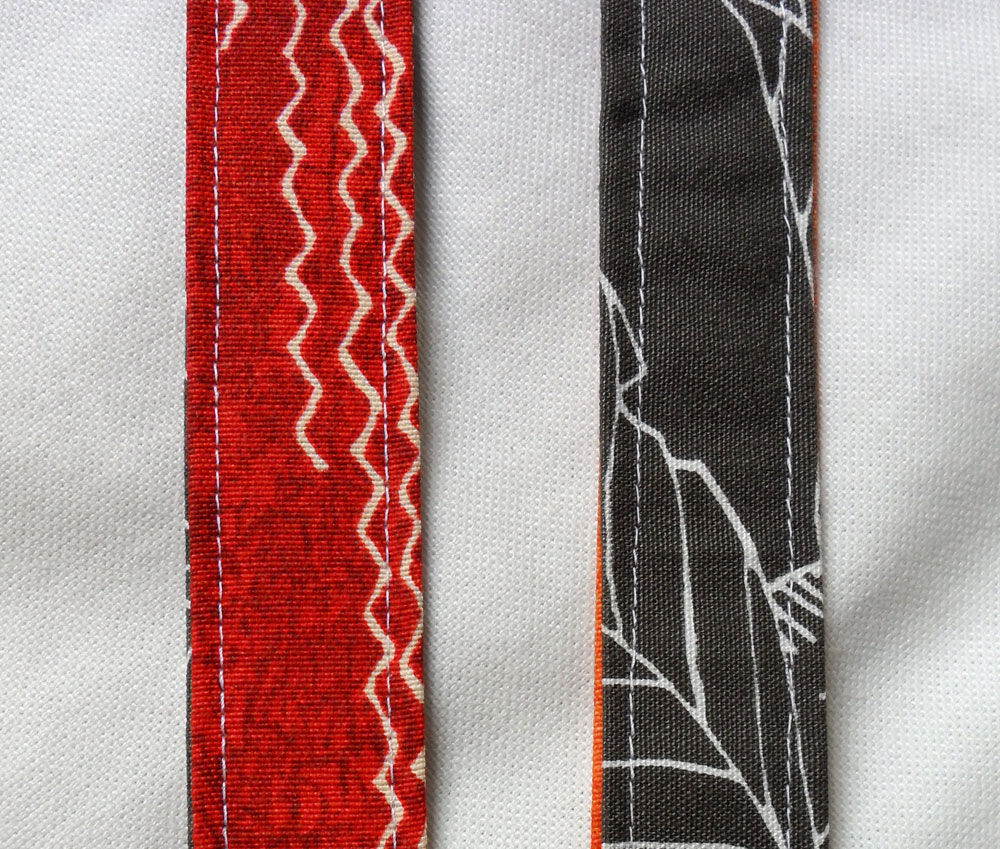
Two handles are finished, each with two different sides.
Tip: I work with a yarn in a contrasting color. If you prefer the seams to be more subtle, you can simply use two different yarns, each matched to a fabric, as the upper and lower thread.
Now the straps are attached to the bag body.
To do this, place the handles in a loop on each piece of fabric. The same sides should be on top of each other so that the handle and bag fit together later. (In this case it is orange on orange) The handles protrude a little beyond the edge of the bag part.
Secure the handles with needles and topstitch near the edge of the fabric. This is only for fixation during further processing. Remove the needles.

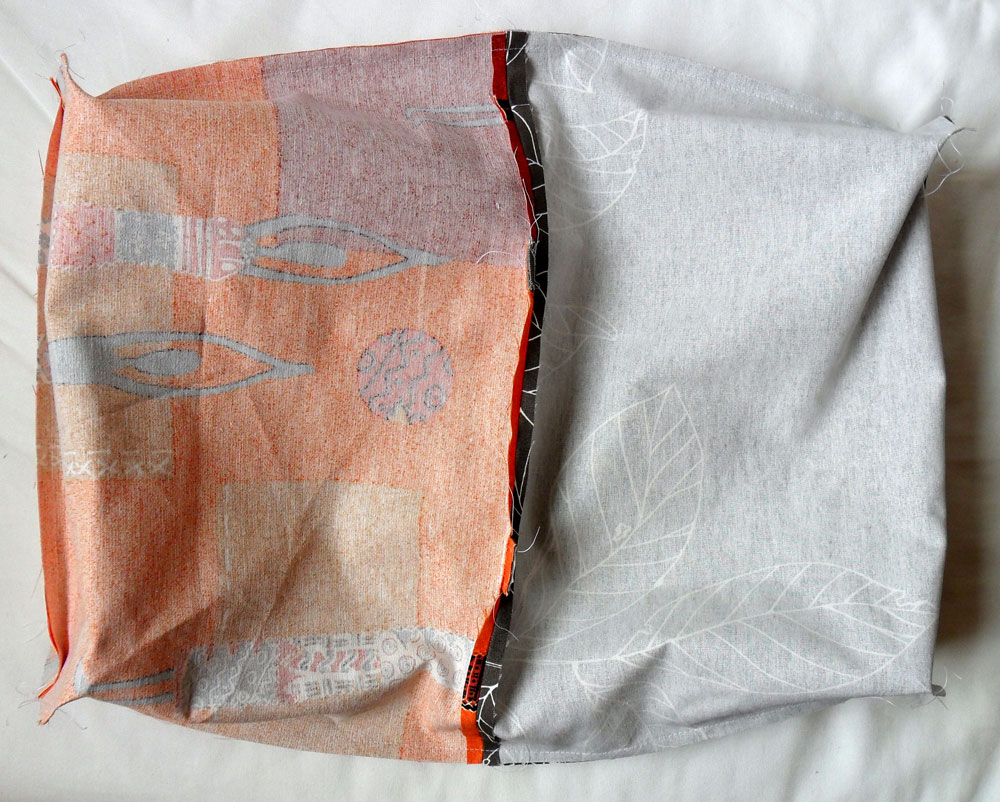
Place a bag made of the other fabric on each of these bag parts. The right sides are on top of each other.
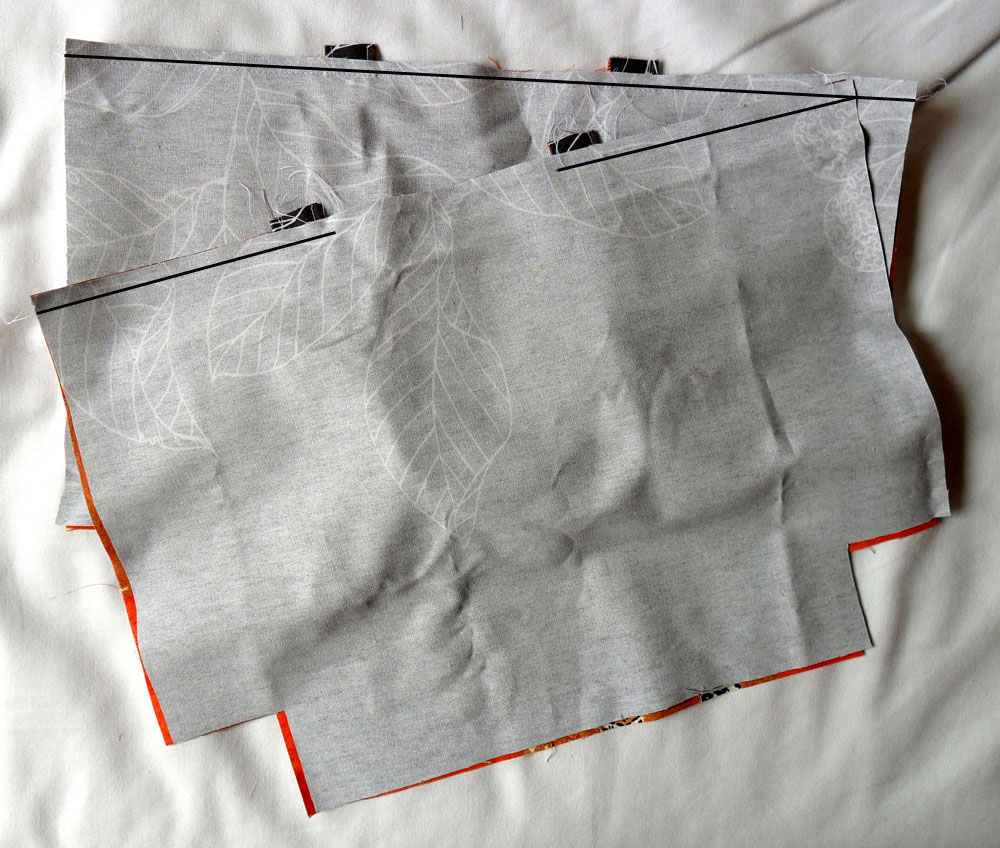
Topstitch a centimeter wide at the top, i.e. on the edge with the straps.
Attention! One of the parts can be sewn from top to bottom. In the second part, sew just up to just above the carrier, fix the seam with a few back and forth stitches and repeat from the other side. So there is a gap between the two handle ends. This is our turning opening for later.
In the photo I marked the seams with black lines.
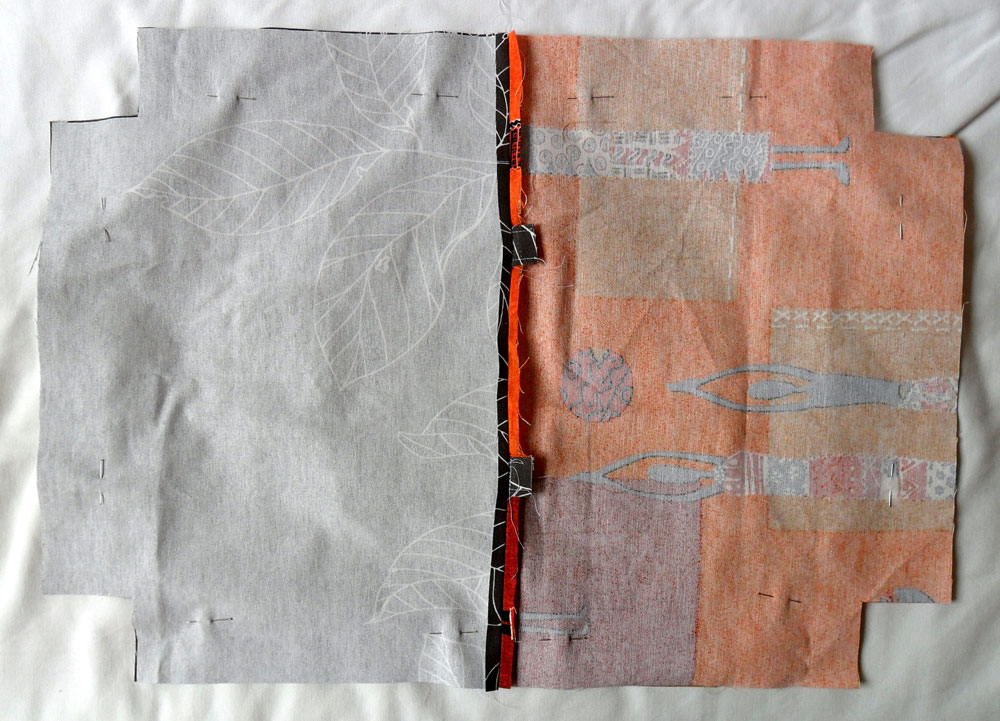
Press the seams open. Place the two parts on top of each other, right side on right side. The same fabrics should lie on top of each other, i.e. orange on orange and gray on gray. Fix with needles.
Then all four sides are stitched with a centimeter distance. The cut squares remain open!

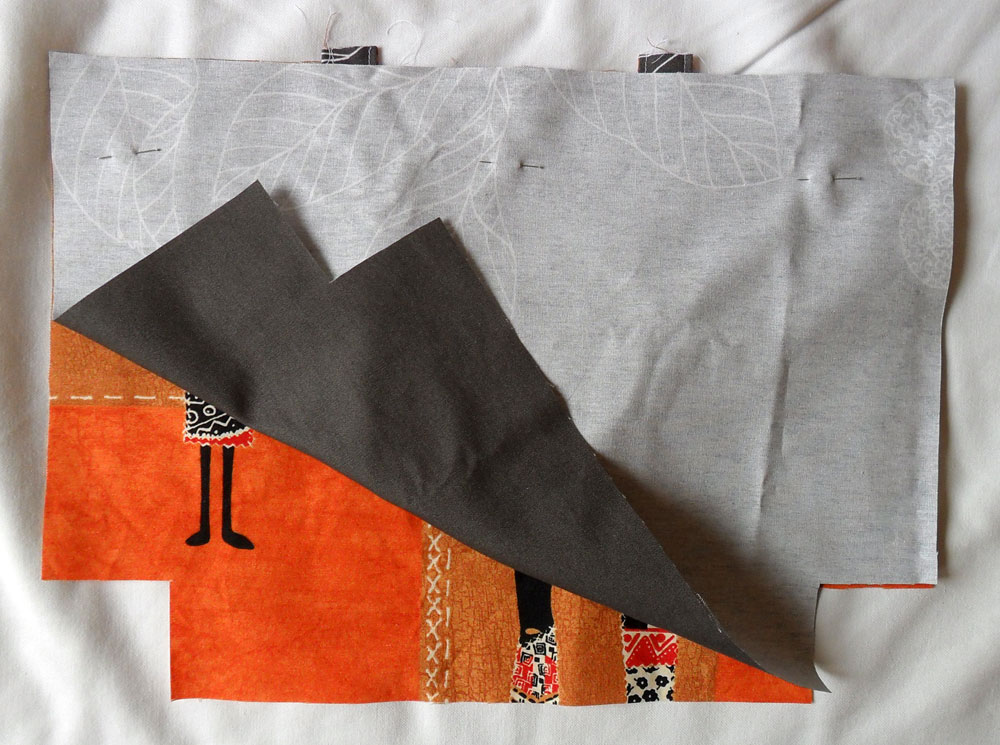
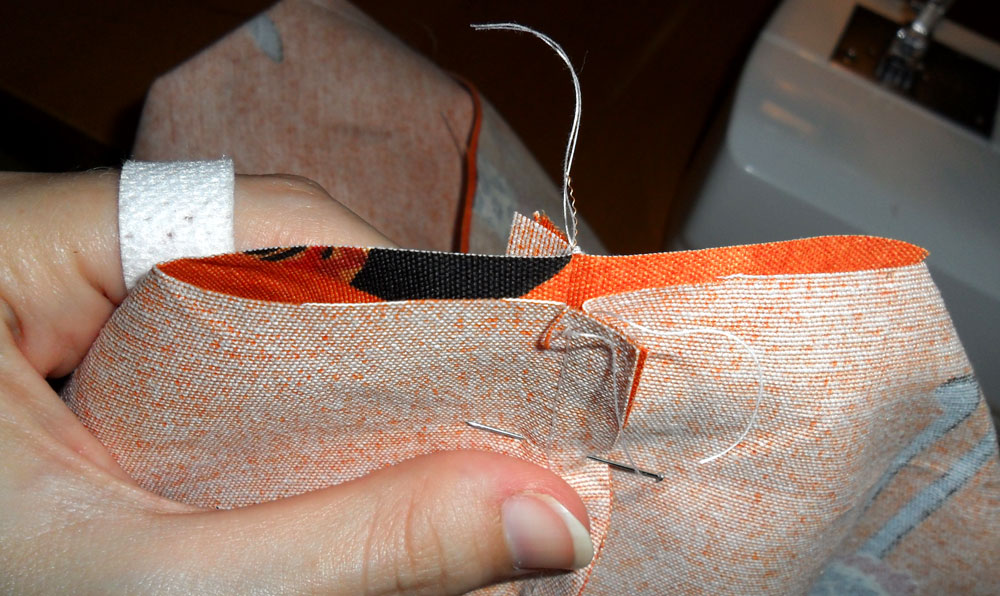
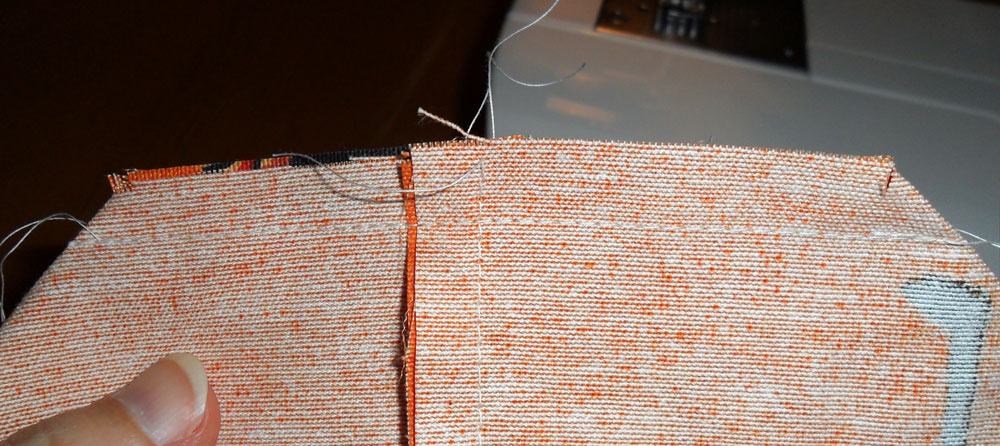
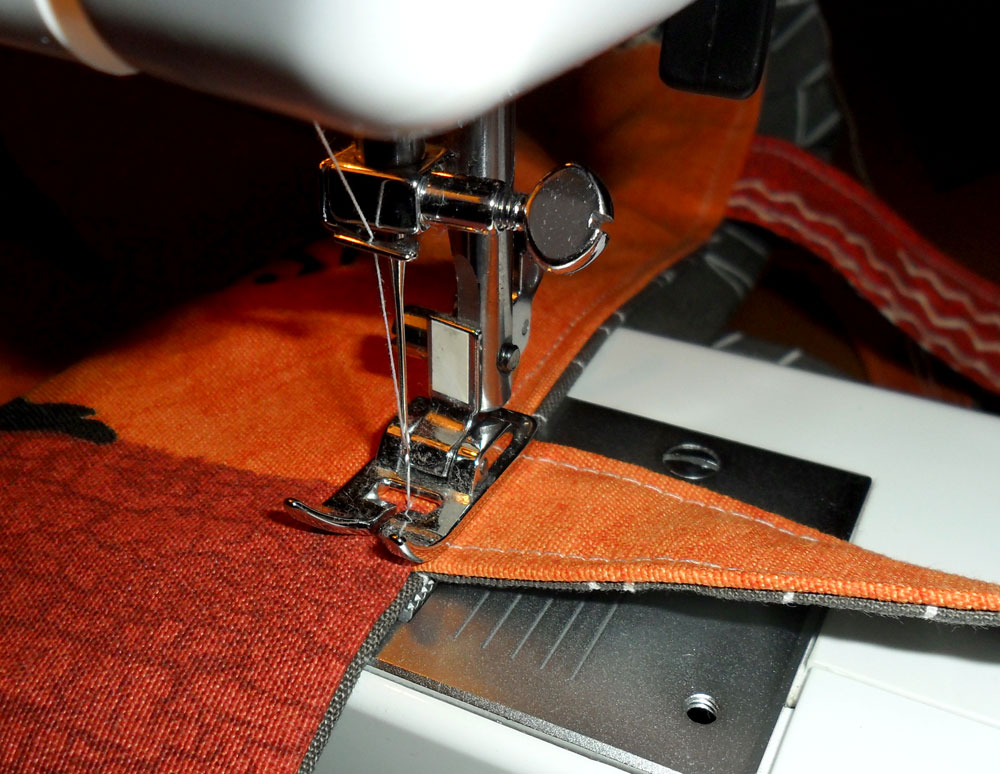
In the next step, these corners are closed.
To do this, pull the two fabrics apart and press them together again neatly after seam. This creates a straight line from the square section. Topstitch on this edge a centimeter apart. Lock the seam well at the beginning and end with a few back and forth stitches.
During this step, care should be taken to ensure that there are not too many layers of fabric on top of each other. You can either iron the seams beforehand or fold one side to the left, the other to the right.
Now reach through the turning opening and turn the bag to the right. Then slip one side of the bag into the other.
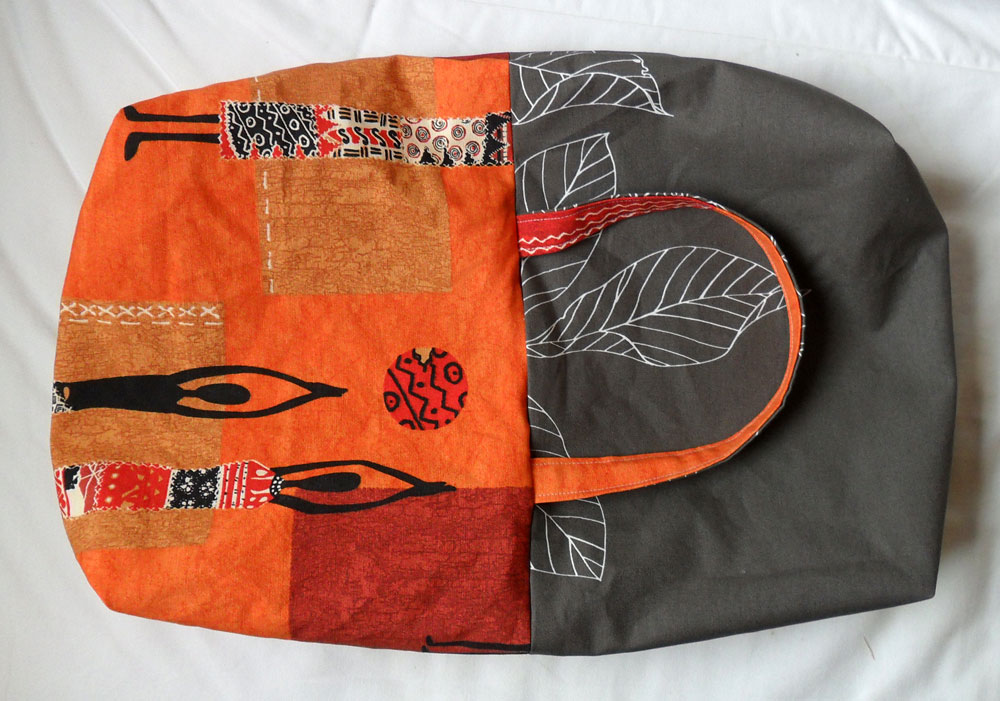
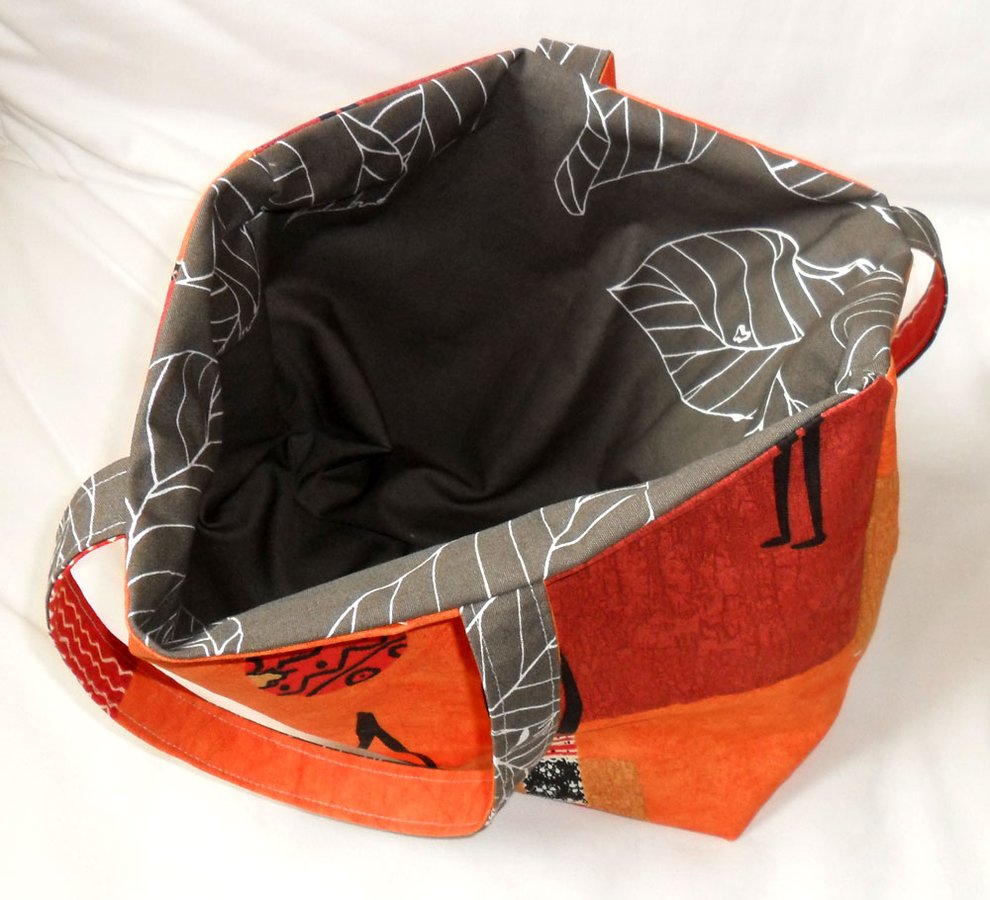
Now sew around the upper edge once more. This closes the turning opening. Finally, pull the thread ends inwards with a hand needle.
Einen neuen Shopper könnte ich eigentlich auch selbst mal wieder brauchen...